
Azure Policy is a service in Azure that you can use to create, assign, and manage policies. These policies enforce different rules and effects over your resources, so those resources stay compliant with your corporate standards and service level agreements.
Azure Policy meets this need by evaluating your resources for non-compliance with assigned policies. All data stored by Azure Policy is encrypted at rest.
In this guide, I will explain how to use Azure Policy in order to detect Virtual Machines that are not included in Azure Backup. This policy is important to be sure that your backups are compliant.
First, open the Azure Portal and go to “Policy”:

In this section, there are two sections to understand:
- Policy Definitions: Every policy definition has conditions under which it’s enforced. And, it has a defined effect that takes place if the conditions are met.
- Policy Assignments: To implement these policy definitions (both built-in and custom definitions), you’ll need to assign them. You can assign any of these policies through the Azure portal, PowerShell, or Azure CLI. A policy assignment is a policy definition that has been assigned to take place within a specific scope. This scope could range from a management group to an individual resource.
Please note that you can exclude a subscope from the policy assignment.
Policy definition
Navigate to the “Definitions” tab to list all the Azure Policies:
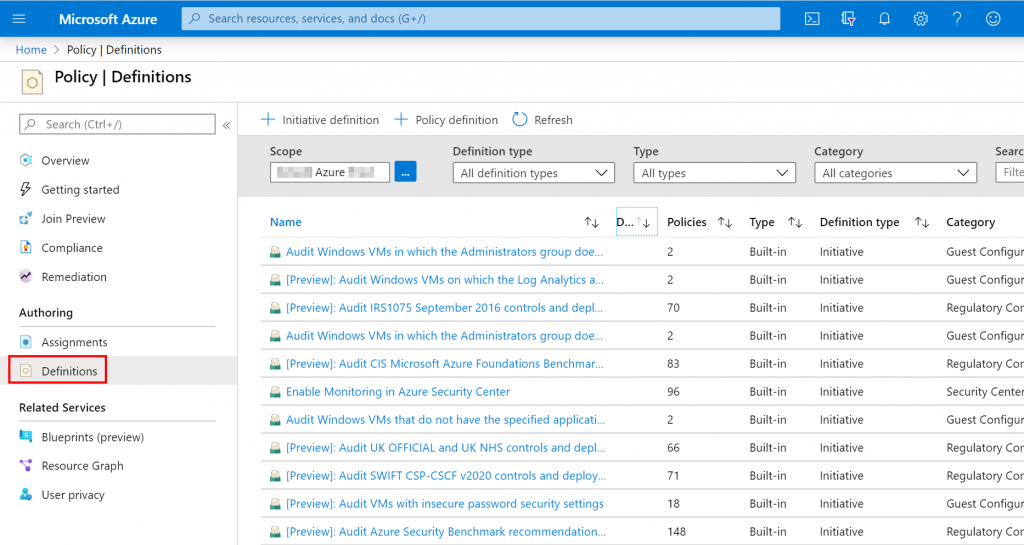
Here, I use an existing Azure Policy, but you can create your own Azure Policy by selecting “Policy Definition”. Enter the word “backup” in the search field and press enter.
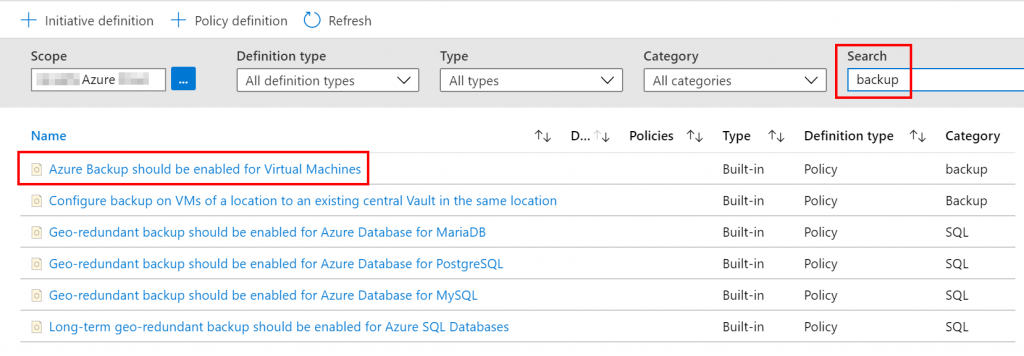
Azure will show you the policies matching with the word “backup”. In my case, I select the first one in order to know which Virtual Machines are not included in Azure Backup.
Policy assignment
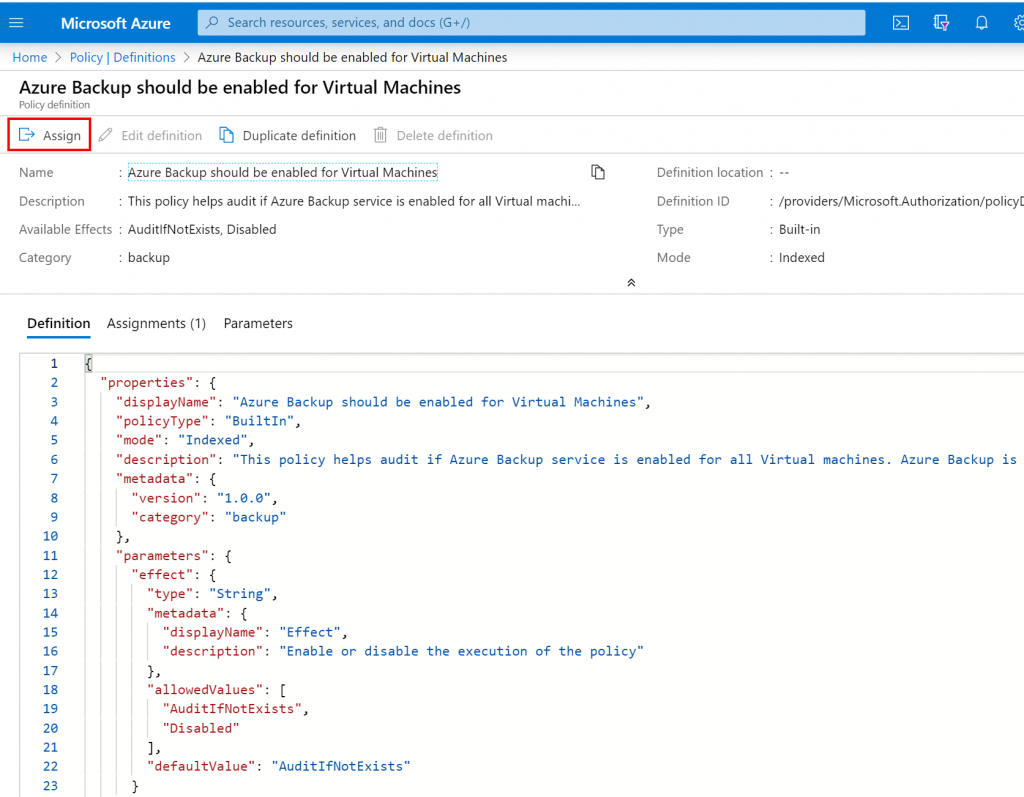
When you select the Azure Policy, you can see:
- The definition
- The assignments
- The parameters
To assign the Azure Policy, it is very simple, just click “Assign”:
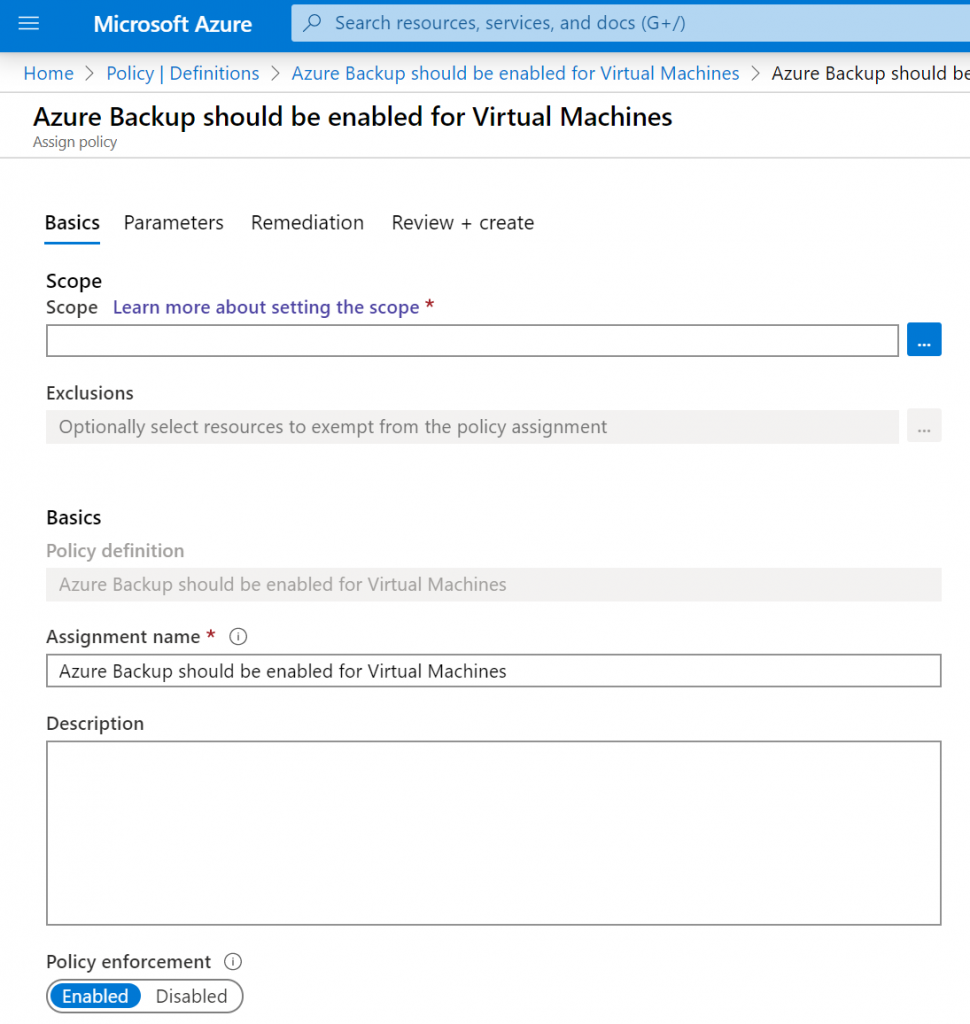
A new blade will appear, and you have to enter the following information:
- Scope in order to define the resources you want to audit
- Exclusions if you need to exclude a Resources Group or a Resource
- Assignment name to give a friendly name for this policy
- Description (optional)
- And the policy enforcement
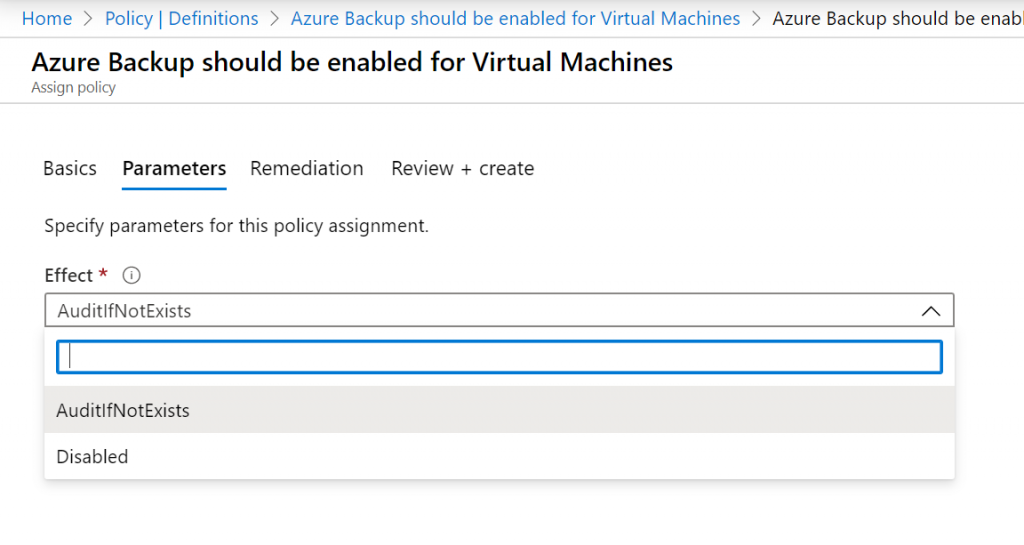
Next, you must specify parameters for this policy assignment:
- AuditIfNotExists: AuditIfNotExists enables auditing on resources that match the if condition. When triggered, the resource that satisfied the if condition is the resource that is marked as non-compliant.
- Disabled: This effect is useful for testing situations
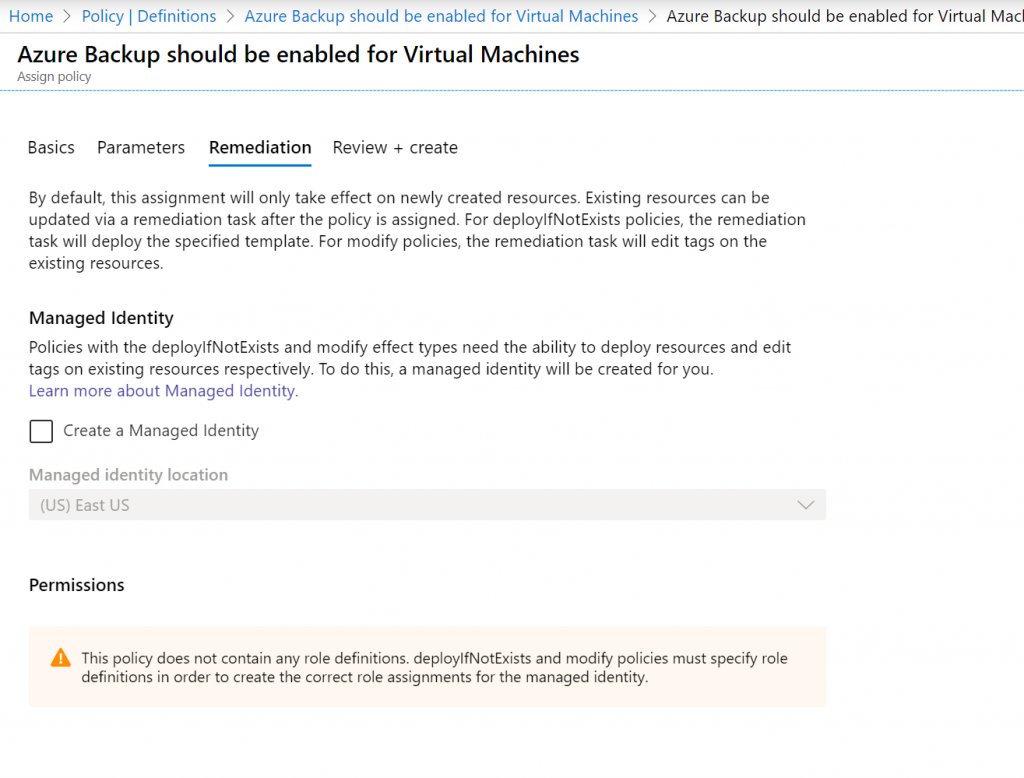
In the next tab, we can define the remediation actions if the parameter “deployIfNotExists” is selected. In this example, the policy does not accept this parameter so we can’t define a remediation task.
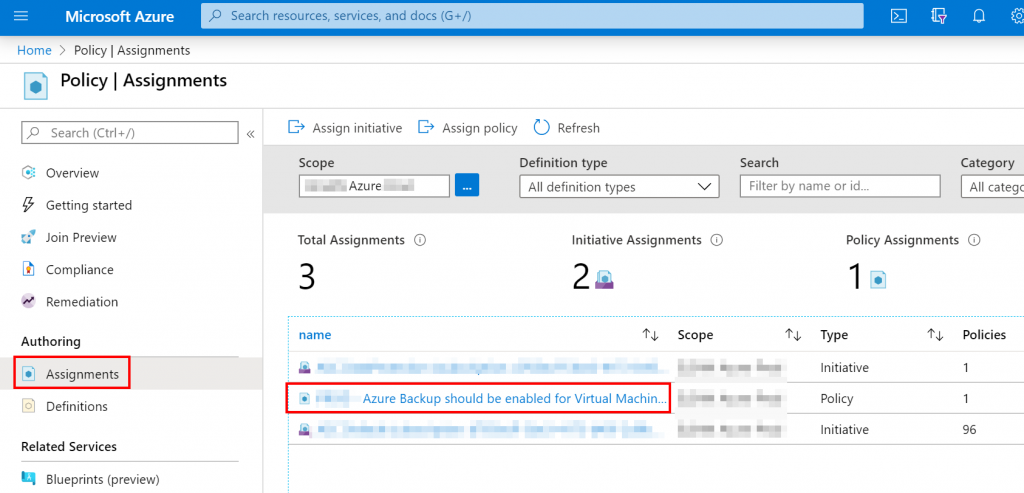
After validating the assignment, you can see the policy in the “Assignments” section
Compliance
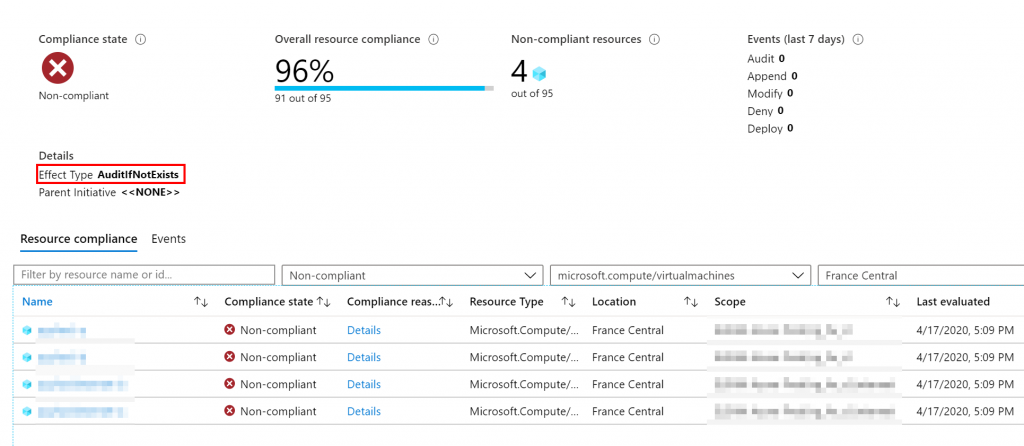
Navigate to the “Compliance” section, select the policy previously created
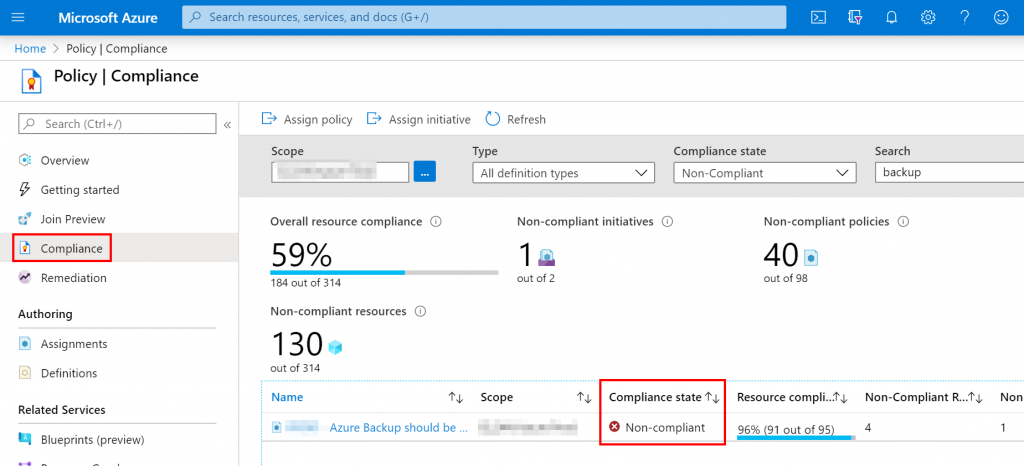
Now, you can check the Virtual Machines that are not in the Azure Backup vault.
Conclusion
Thanks to Azure Policy, we can easily audit Azure subscription with few actions.
Please note that it is better to start with Azure Policy audit to understand how it works, and then, apply remediation tasks.
Related materials:

Views All Time
3

Views Today
3
The following two tabs change content below.
Filed under:
Software by Nicolas Prigent