You can extend on-premises deployments of Windows Server to the cloud by using Azure Hybrid Services. Azure Hybrid Services work with Windows Servers in the following configurations:
- Stand-alone physical servers
- Virtual machines
- Clusters
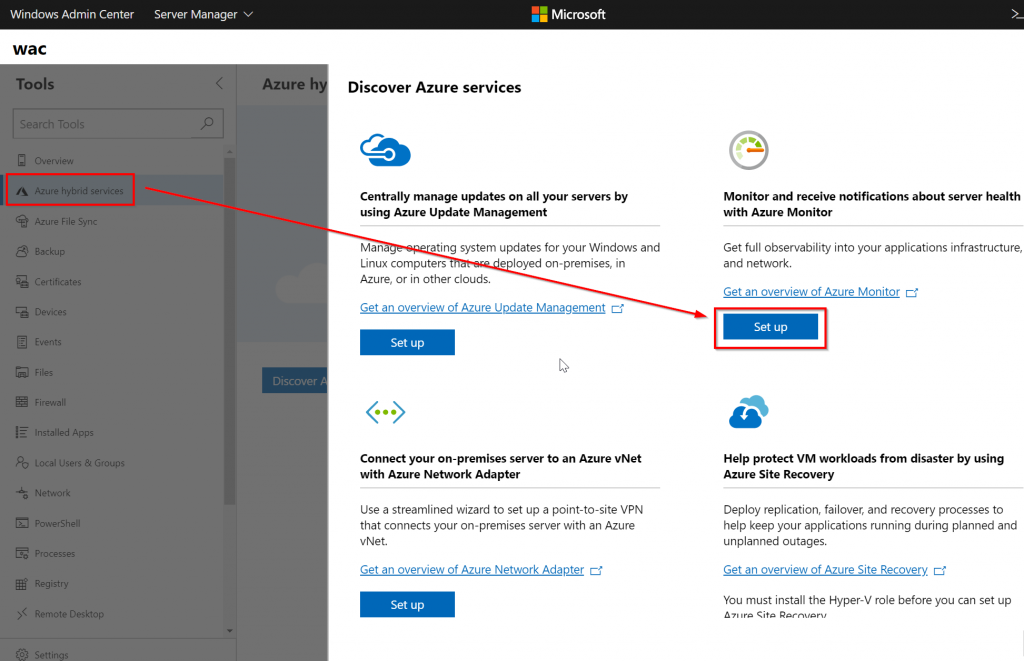
While you can set up most Azure hybrid services using the Azure portal, many are integrated directly into Windows Admin Center to provide a simplified setup experience as shown below. The diragram is provided by Microsoft.

The Azure hybrid services tool in Windows Admin Center consolidates all the integrated Azure services into a centralized tool where you can easily discover all the available Azure services.
From the Azure hybrid services tool, you can:
- Backup your Windows Server with Azure Backup
- Protect your Hyper-V Virtual Machines with Azure Site Recovery
- Sync your file server with Azure File Sync
- Manage operating system updates with Azure Update Management
- Monitor servers and configure alerts with Azure Monitor
- Connect your on-premises servers to an Azure Virtual Network with Azure Network Adapter
In this article, I will explain how to monitor and get email alerts for all the servers in your environment with Azure Monitor for Virtual Machines.

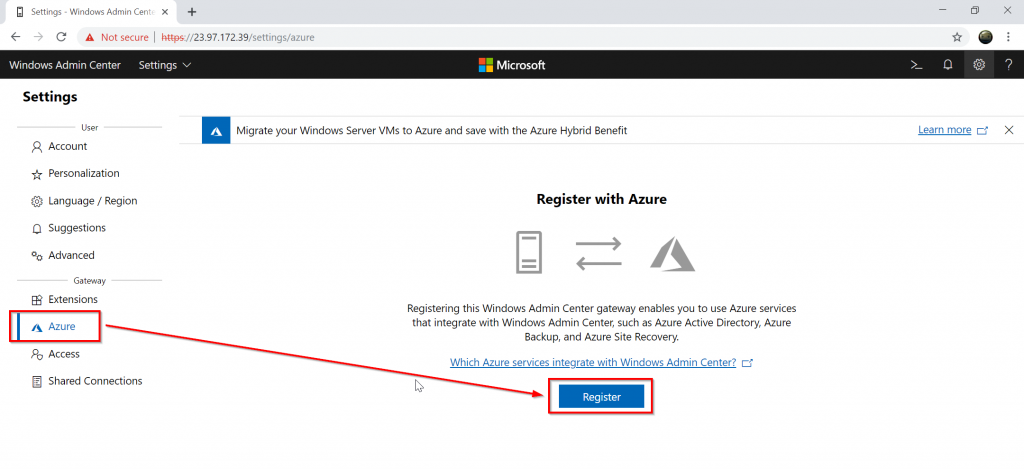
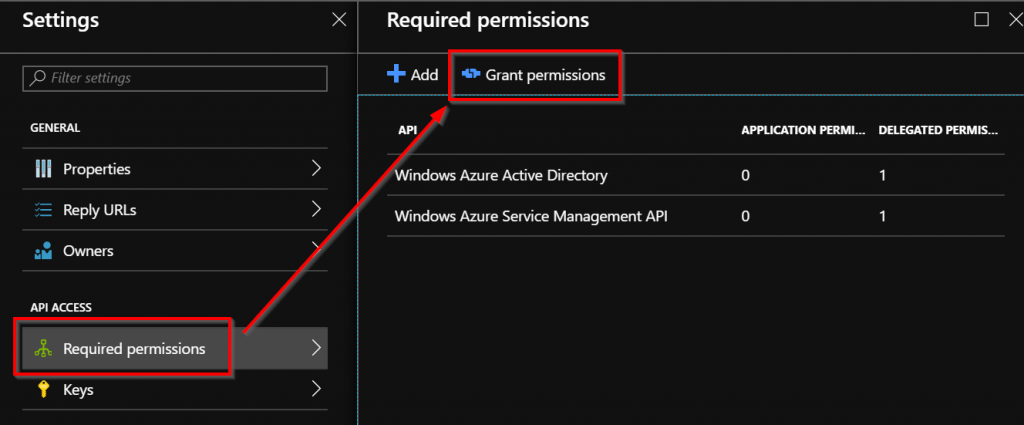
You need to register your Windows Admin Center gateway in order to use Azure Services. To perform this task, you must click “Register” and then copy/paste the code displayed on your device. The device will be logged in Azure and it will registered an application in your Azure AD called “WindowsAdminCenter”. To finish the registration process, you must grant permissions

Open the Azure Portal, click “Grant permissions”

Click “Yes” to confirm the permissions for the WindowsAdminCenter App

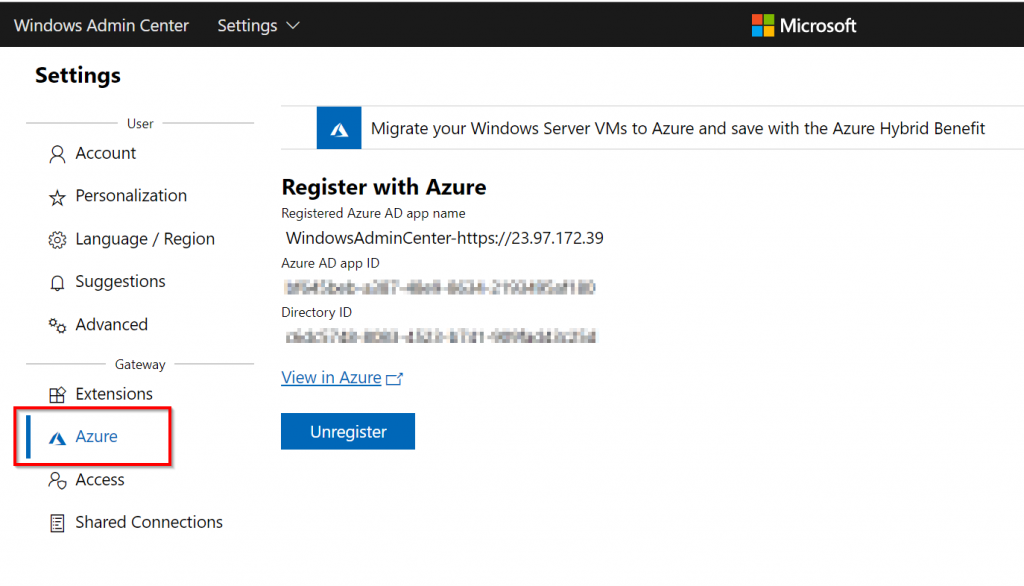
Go back to your Windows Admin Center and confirm that WAC is registered in Azure

Once the registration is done, you can go to “Azure Hybrid Services” and click “Set up” to configure Azure Monitor.

The configuration pane will appear, then you must enter the following information:
- The Azure subscription
- The Resource Group
- The Log Analytics Workspace
Next, you can click “Set up” to validate the configuration.

You should see the following output:

To confirm if the configuration is ok, navigate to the “Monitoring alerts” tab and click “Create and view alerts in Azure” to be redirected to your Azure subscription

Now, we need to create the first Alert Rule

You must add a condition. It means that you must configure a “signal logic”. In my case, I want to monitor the % used space.

Click “Next” to configure the logic signal. You must enter a value in the “Threshold value” box which will trigger the rule

Next, you must configure the action to perform when the alert is triggered. In this case, I will configure an action type by email

So you should get a similar output

You will get a notification when you add your email address in the Alert rule.

That’s all. At this step, you just need to wait until the alert is triggered (greater than 90%) and you will receive an email.
Related materials:

Views All Time
1

Views Today
4
The following two tabs change content below.
Filed under:
Services by Nicolas Prigent