What is it about ?
VMware vSAN as a hyperconvergent solution allows you to create an infrastructure from typical blocks that combine several functions at once (for example, calculation and storage).
Management of such an infrastructure is carried out through a single interface, and scaling – through the addition of the next block.
Now this is a very rapidly developing direction in the IT industry and a lot of clients around the world are looking towards such solutions because of their relative cheapness, practicality and ease of scaling.
However, in such solutions only SSD (for system and quick availability data) and HDD (for large amount of data storage) are used and there is no possibility to use cloud data storage (for example AWS, Azure, GCP, etc.) for the “limitless” volume of stored data.
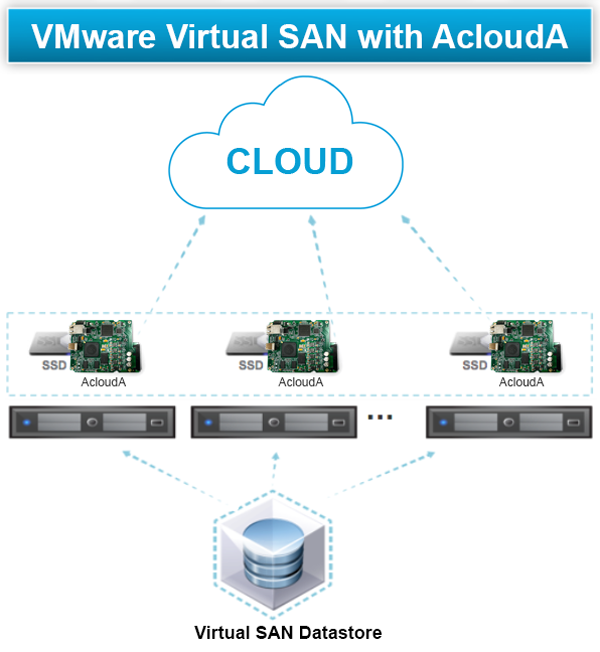
We offer you a solution capable of combining the convenience and speed of vSAN with the reliability and availability of Cloud data storage.
Benefits
Using our AcloudA device, you can connect a cloud data storage (for example AWS, Azure, GCP, etc.) instead of one or more, for fault tolerance, hard drives.
You will be able to transfer your CapEx to OpEx, since you will not have to buy new servers to store an increasing amount of data, and you will be able to pay only for the storage you use.
You can easily and quickly increase the space for storing your data in one click as needed.
In addition, data storage in cloud storage is more reliable than conventional storage methods and is consistent with data storage rule 3-2-1.
Prepearing
Before we begin the deployment of vSAN, we need to prepare an action field.
We use:
- AcloudA device
- All works done on VMware versions 6.5
- 2 ESXi Servers and VMware vCenter Server. (In that case I used VMware vCenter Server Appliance)
- For the building Hybrid Storage, we should have a least 1 SSD and 1 HDD on eatch hosts.
- Configuration vSAN with AcloudA is performed in the normal mode, so as if we were working with HDD. We use AcloudA as a substitute HDD.
Introduction (Cluster overwiev)
VMware ESXi is a very powerful platform for autonomous host configuration (one ESXi host), but its real power, high availability, excellent scalability, manageability and fault tolerance of the entire platform can be fully available only in the vSphere ESXi cluster.
In the VMware ESXi cluster configuration, several ESXi hosts at once provide the computing, network and storage resources for the entire cluster. In addition, they protect clustered virtual machines from server failures.
This can be achieved with VMware vCenter Server (the requirement to create a cluster of VMware ESXi).
The vSphere cluster created includes its HA (high availability) and DRS (distributed resource scheduler) functions. These functions help to withstand failures and distribute resources on VMware ESXi hosts.
In the standalone VMware ESXi configuration, this is not possible.
Introduction (vSAN overwiev)
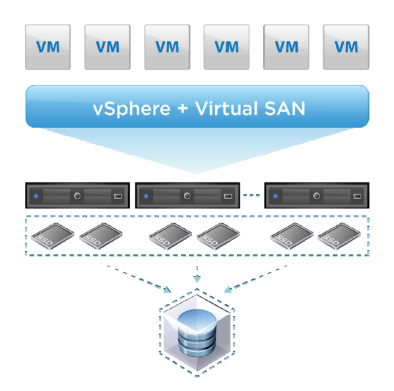
VMware vSAN is a high-performance enterprise-class storage solution for Hyper-Converged Infrastructure. vSAN uses flash drives and local hard disks connected to the server to create a highly stable shared storage for all vSphere cluster nodes.
To ensure high availability VMware administrators, previously required to connect to a SAN, NAS, or DAS device, vSAN eliminates the need for dedicated external shared storage by adding a software layer that can use the local server hardware to provide the same fault tolerance and feature set.
A virtual SAN is uniquely built into the core of the hypervisor right in the I / O path, allowing it to make quick decisions about the location of the data. This means that vSAN can produce the highest levels of performance without using compute resources, unlike other virtual storage devices that work separately on the hypervisor.
Creating a VMware ESXI Cluster
The process of creating a VMware vSphere ESXi cluster is not stacked. You must have a VMware vCenter Server that works with a network connection to the target ESXi hosts, and they must join the cluster. Next, we’ll look at creating a cluster as soon as we connect to the web interface of our vCenter server.
Right click on vCenter server and choose “New Datacenter“. The Datacenter object contain all the different types of objects needed – hosts, VMs, networks, datastores.
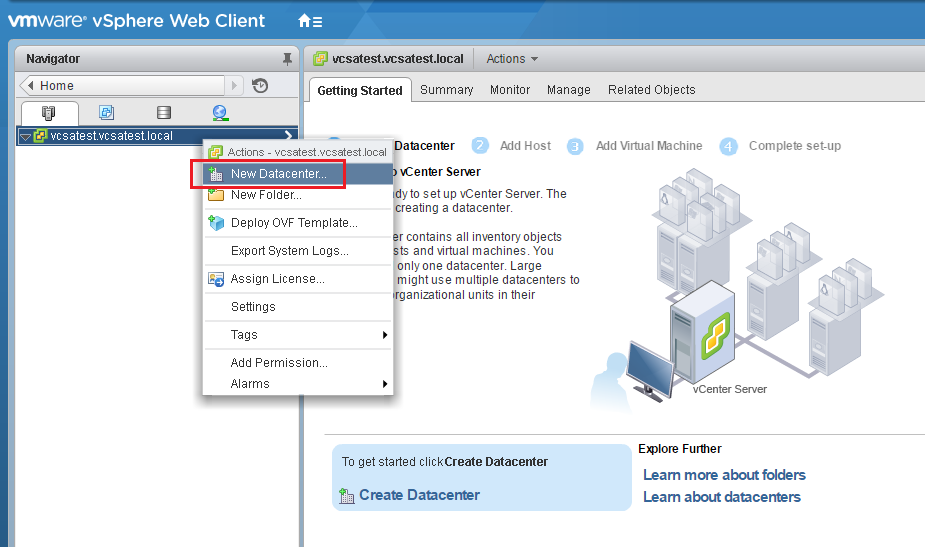
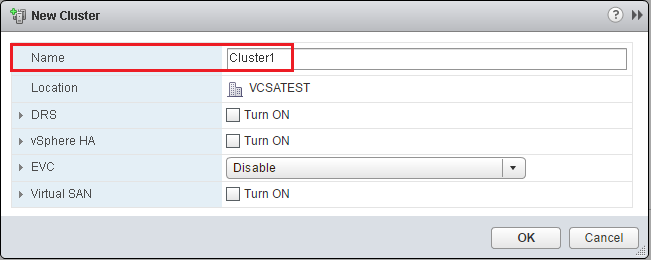
In the next Window give a “Name” to your new Cluster.
When the cluster object added, we can “Add Hosts” to the Cluster object, after that the host’s resources become part of the cluster’s resources. The cluster manages the resources of all hosts.
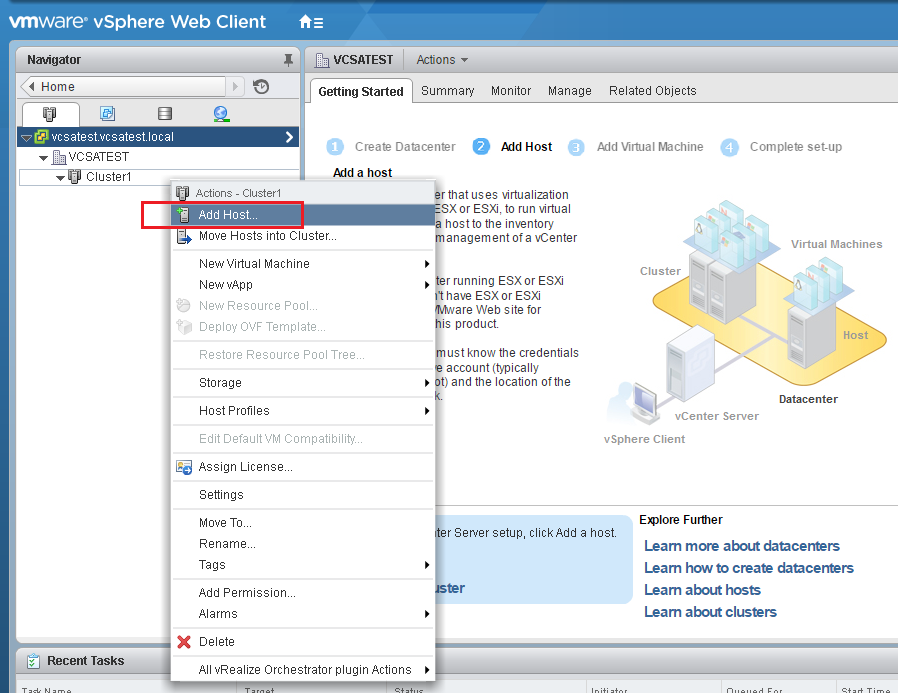
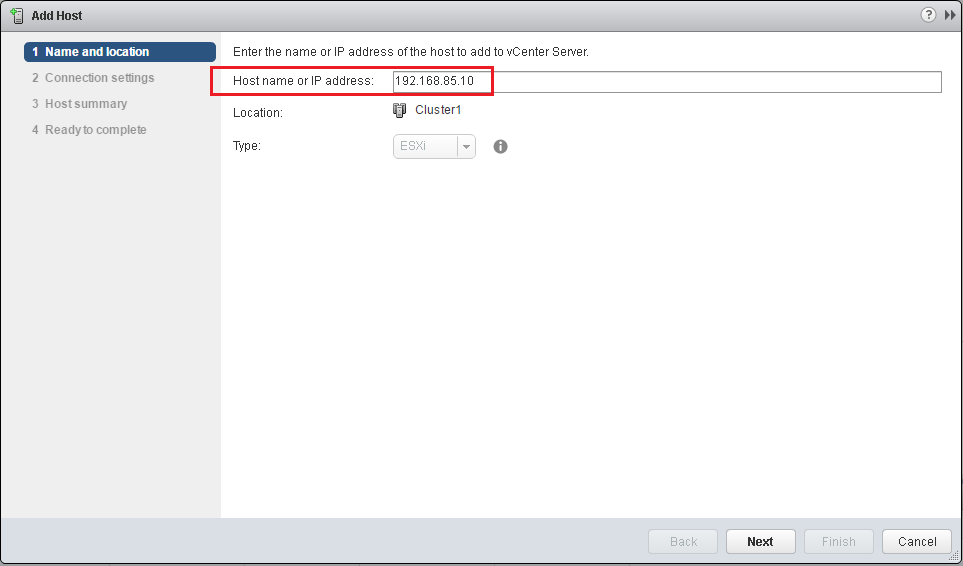
Choose Add Host to enter the “Name and location” window where you can enter the “Host name or IP address” of the host to add to the cluster.
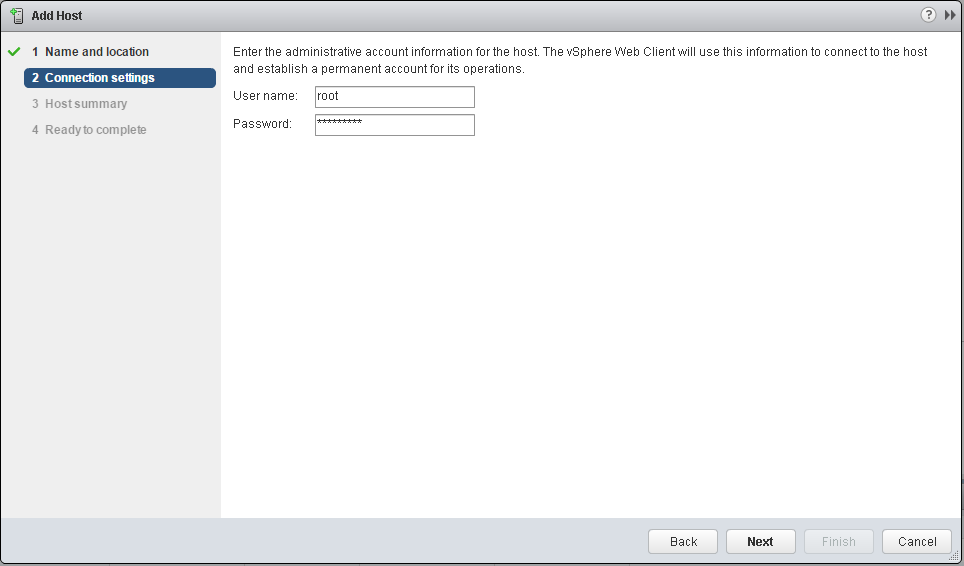
In the next window “Connection settings” enter “User name” and “Password” to access the host.
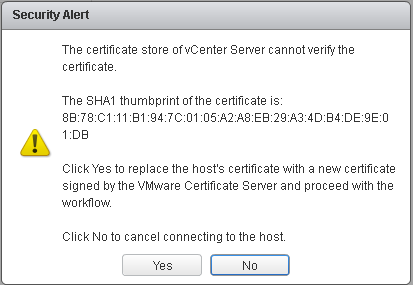
After clicking “Next” you may receive a certificate alert. This is a common warning with self-signed certificates present on the hosts by default and we may ignore this warning simply clicking “Yes“.
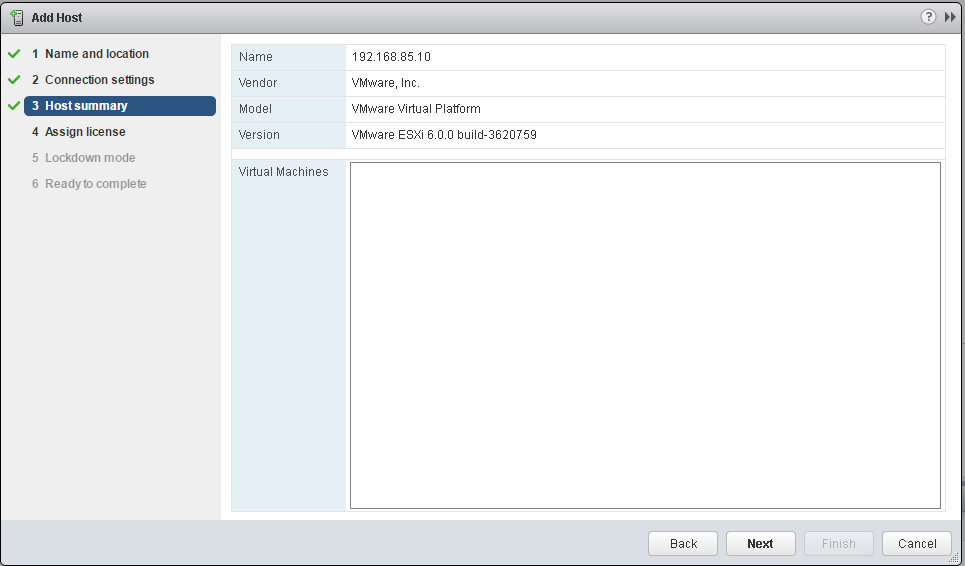
In the next window “Host summary“, you may see any VMs that are present on the host.
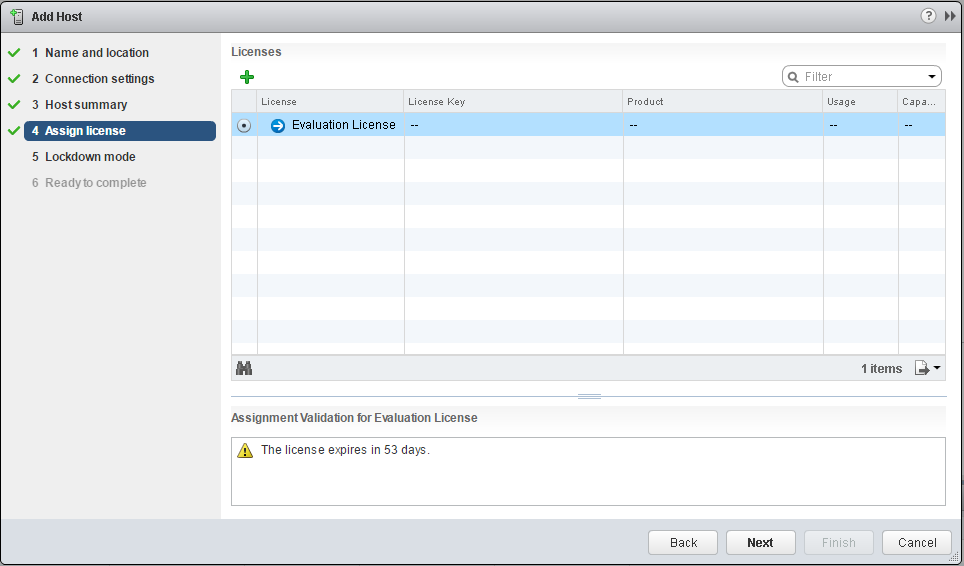
In the next window “Assign license“, we have the option to select the license we want to use on the host. You may use trial license for 60 days, simply choosing the evaluation license.
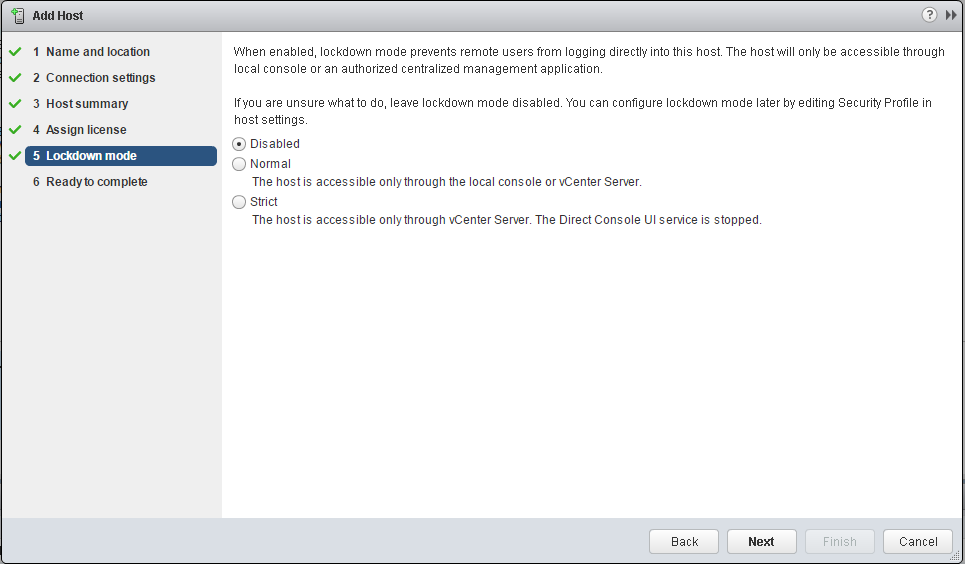
In the next window “Lockdown mode“, you can prevents remote users from logging into the host directly. This option is available for a more secure posture with the ESXi hosts. This can be enabled later as well.
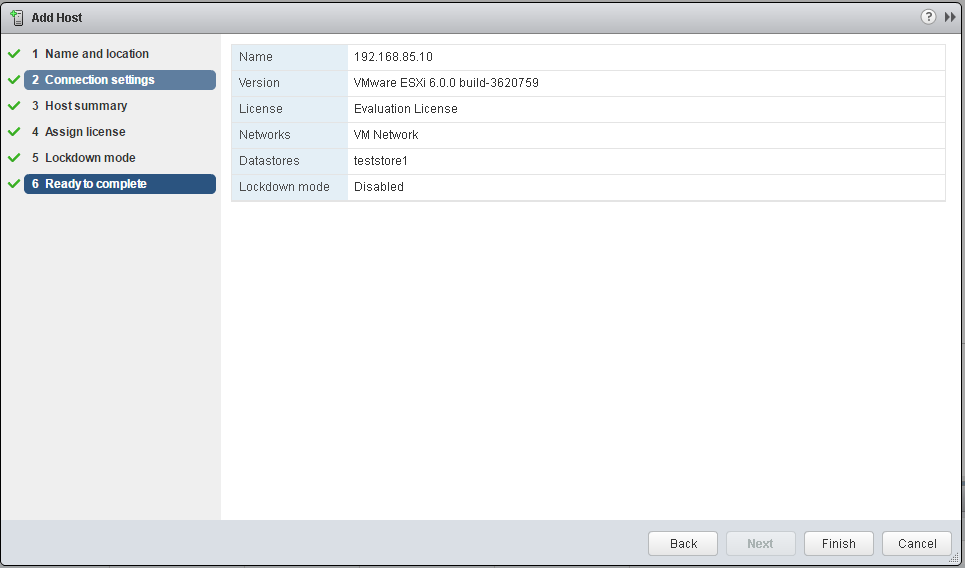
Next window “Ready to complete” is final to add the host. We will continue this process for all the hosts we wish to join to the cluster.
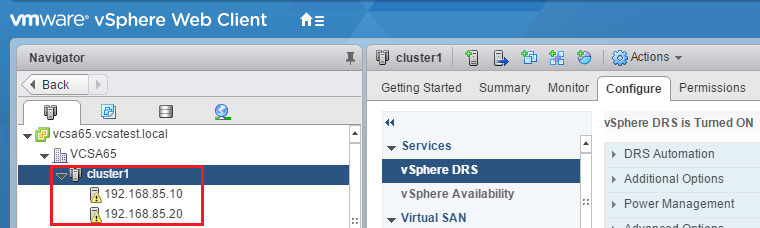
You can check that our two ESXi hosts joined to the cluster we made.
vSAN Configuration
For vSAN, no software is needed – all the necessary components are already built-in to the hypervisor. All you need to do is enable the necessary functions of the vSphere web client.
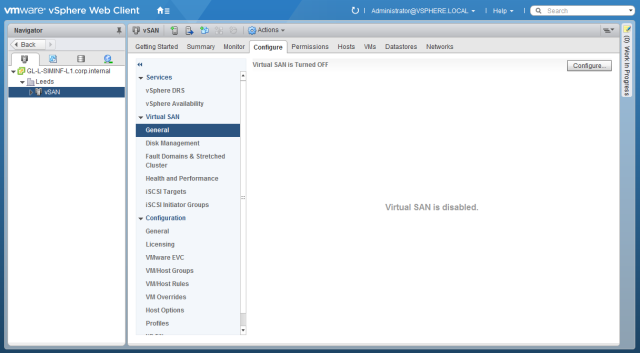
Choose the necessary cluster in the “vSphere web client” and go to the “Configuration” tab. Expand Virtual SAN and select “General“, you will see a message stating that “Virtual SAN is disabled” and click “Configure“.
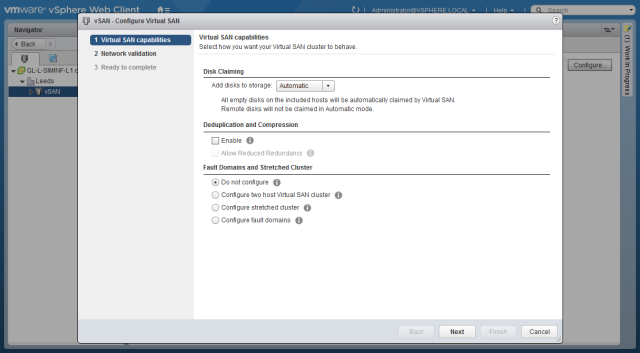
By default, any suitable disks will be added.
In “Virtual SAN capabilities” window, you can manually select the discs, change the disc’s setting to manual. You can also view other options by hovering over the gray circle of information. Select all the necessary functions and click “Next“.
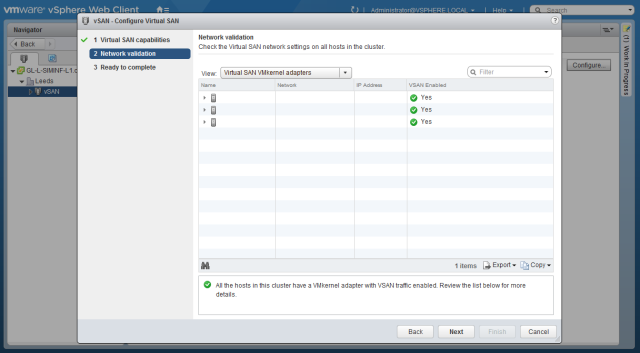
In the next window “Network validation” you will see that each host in the cluster has a valid vSAN kernel port, confirm that by clicking “Next“.
In the next window “Ready to complete” you will see the summary page and simply click “Finish“.
Now the virtual SAN network integrates the selected resources into the vSAN datastore and you can immediately start the provisioning machines. vSAN creates and represents a single datastore that contains all disks for each vSphere cluster.
Creating vSAN tier storage
Please read how to configure AcloudA device – “Quick Start Guide (SATA)” or “Quick Start Guide (USB)” before continue.
Select the created cluster and go to the tab “Configure/General(vSAN)/Configure…”
In the running wizard, in the previous step, we mark flash drives as Cache tier and AcloudA as Capacity tier.
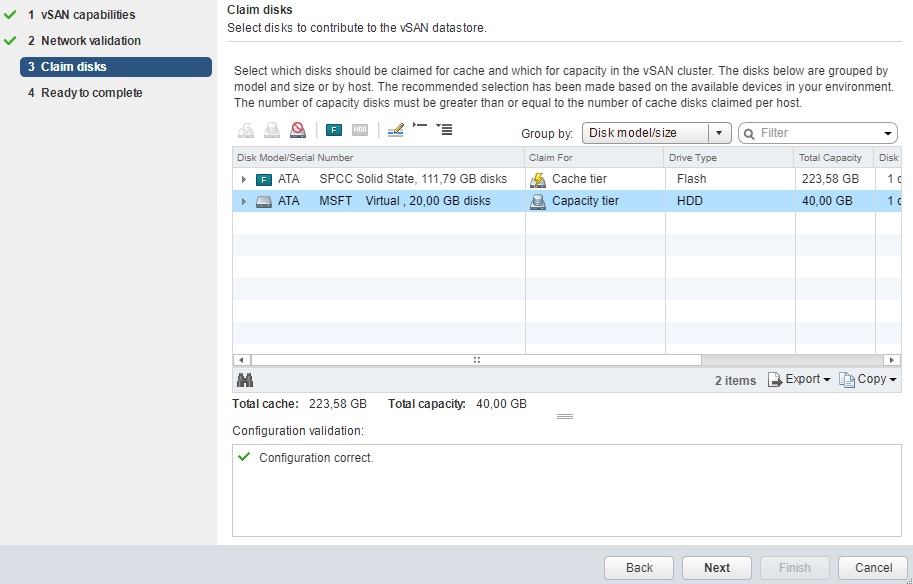
Finally, click “Next” and finish the wizard. The connection is complete, you can start using the vSAN.
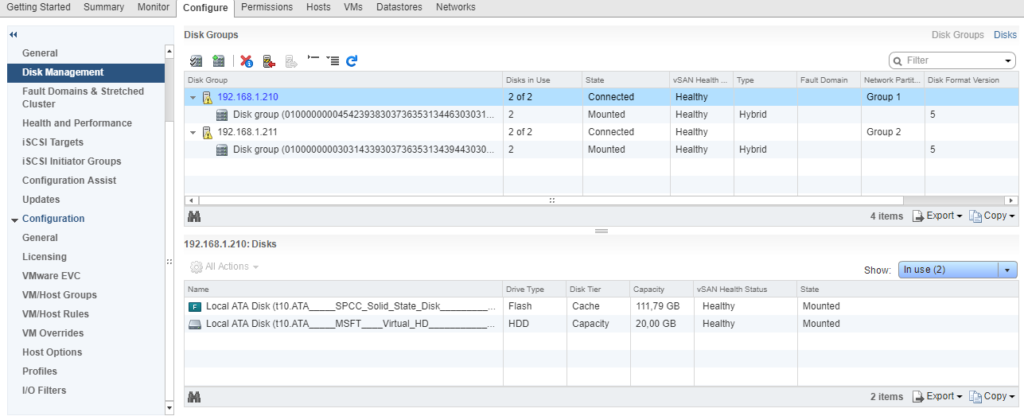
In the end, we should see something like a picture
Conclusions
We created a cluster based on VMware ESXi, configure vSAN, and using AcloudA instead of the usual HDD created a tiered storage for data in cloud.
Fill the form below to get Extended version of this Guide