Installation:
1. Turn your computer off first
2. Connect the AcloudA as a hard disk
3. Connect the network cable
4. Turn your computer on
5. Enable the “Hot Plug” option in “BIOS Setup”, for SATA
(in which connected the device)
6. Download and install the utility
7. Open the browser and go to the ip-address of the device
(for the first usage, the device receives an ip-address via DHCP, the device address can be viewed in leasess DHCP-Server)
8. Log in using your login and password
(by default: login – admin, password – password)
9. Click the iSCSI tab
10. Add target
(specifying ip and port, click “add server”)

11. Click on the server you added, and select the target from the list

12. Enter the data for authentication, if necessary
(it should consist only of Latin characters and numbers and be a length of 12 to 16 characters)

13. Select the “SATA” connection interface

14. Click “add connection” and continue working like with regular hard disk
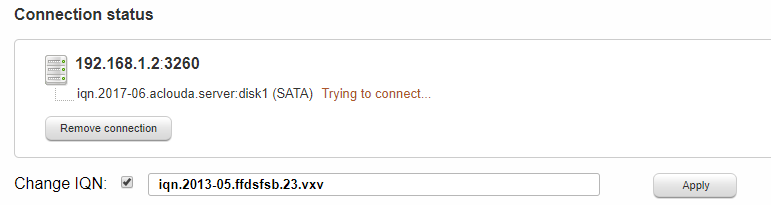
Changing IQN of device:
1. Select “iSCSI” tab
2. Check “Change IQN” box
3. Enter new IQN and apply
(changing IQN is available only from version 1.55)
4. To reset the IQN to the factory settings you must completely reset the settings in the “Reset” tab.