What is it about ?
Microsoft Storage Spaces the technology of disk space virtualization, which first appeared in Microsoft Windows Server 2012, and give you apportunity to combine individual physical disks of the server into one or more pools, on the basis of which volumes with different levels of performance and fault tolerance are created.
Now this is a very rapidly developing direction in the IT industry and a lot of clients around the world are looking towards such solutions because of their relative cheapness, practicality and ease of scaling.
However, in such solutions only SSD (for system and quick availability data) and HDD (for large amount of data storage) are used and there is no possibility to use cloud data storage (for example AWS, Azure, GCP, etc.) for the “limitless” volume of stored data.
We offer you a solution capable of combining the convenience and speed of vSAN with the reliability and availability of Cloud data storage.

Benefits
Using our AcloudA device, you can connect a cloud data storage (for example AWS, Azure, GCP, etc.) instead of one or more, for fault tolerance, hard drives.
You will be able to transfer your CapEx to OpEx, since you will not have to buy new servers to store an increasing amount of data, and you will be able to pay only for the storage you use.
You can easily and quickly increase the space for storing your data in one click as needed.
In addition, data storage in cloud storage is more reliable than conventional storage methods and is consistent with data storage rule 3-2-1.
More about Storage Spaces
Storage Spaces is a feature that appeared in Windows Server 2012, is a mechanism for virtualizing the disk subsystem to ensure high availability and scalability of storage solutions for both the individual server and the cluster. Storage Spaces allows you to combine multiple physical disks into one logical disk. If you have SSD in the system, you can create a two-level logical disk where the flash drive is used for hot caching, which greatly increases the speed of access to the most frequently requested files.
For more information about Storage Spaces, visit technet.microsoft.com.
Installation:
As initial data, we have a server with Windows Server 2016 installed, two SSD disks and two AcloudA adapters configured. An operating system is installed on one of the SSD disks.
- We have to create 2 iSCSI target using the instruction «Install and Configure iSCSI on Windows Server 2016» or in any other, convenient for you way. (Targets may be created on the tested server or on the Data Storage System)
- Configuring Aclouda on created Targets according to the instruction «Quick Start Guide» on Download page of AcloudA site.
- In the Server Manager navigation pane choose “File and Storage Services”. Then select “Storage Pools”.
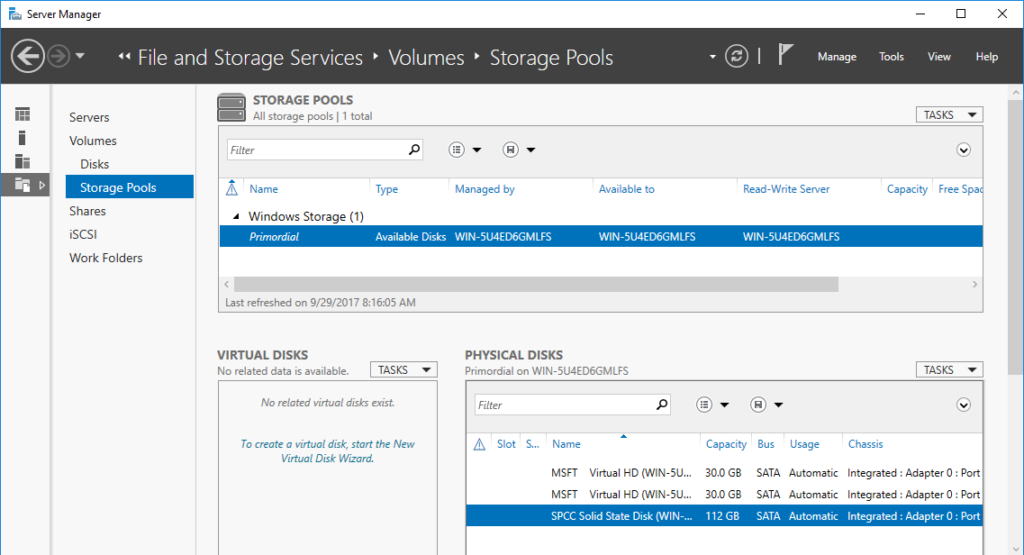
- In “Storage Pools” choose “Tasks” and then choose “New Storage Pool”.

- In the window “Before you begin” click “Next”.
- In the window “Specify a storage pool name and subsystem” enter the name of pool, also you may add a description for pool. Choose a group of available physical hard drives and click “Next”.
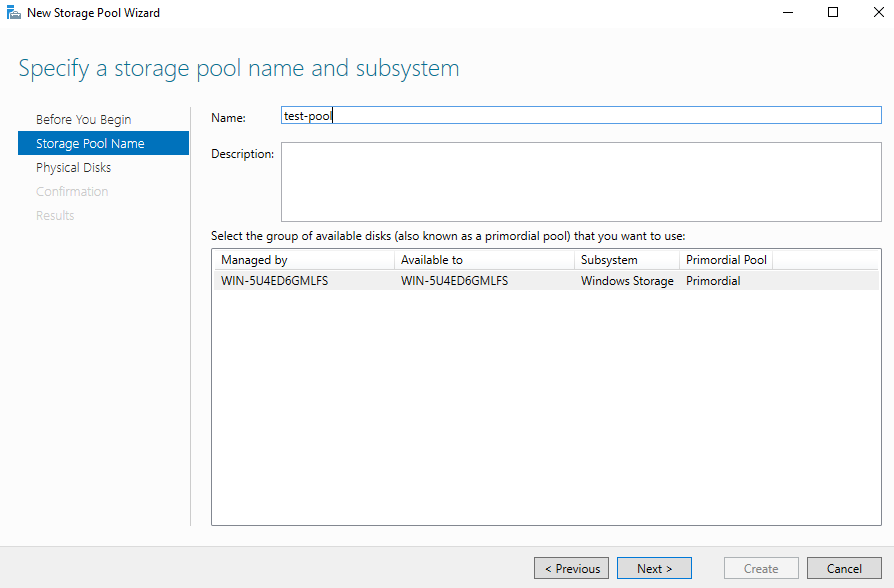
- In the window “Select physical disks for the storage pool” choose three disks for addition to Storage Pool.
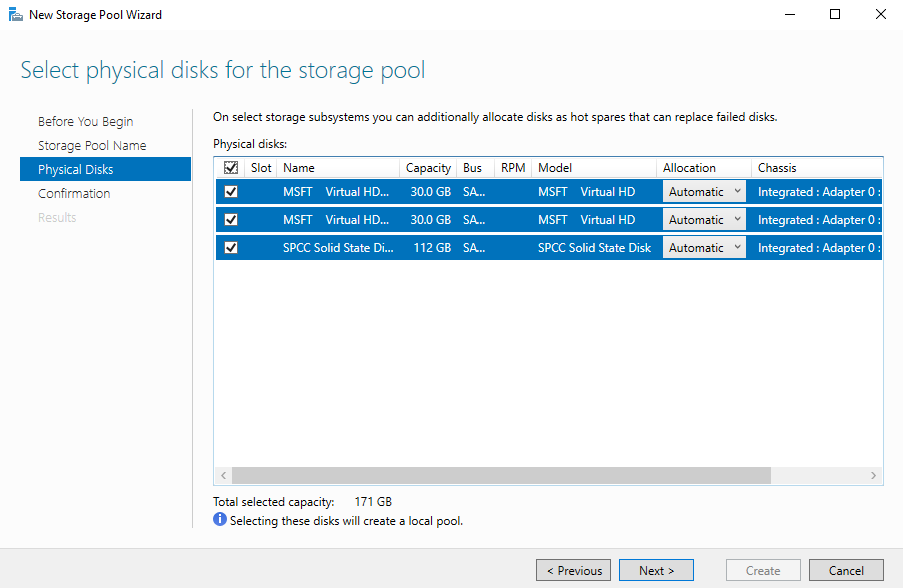
- In the window “Confirm selections” check all your settings and click “Create”.
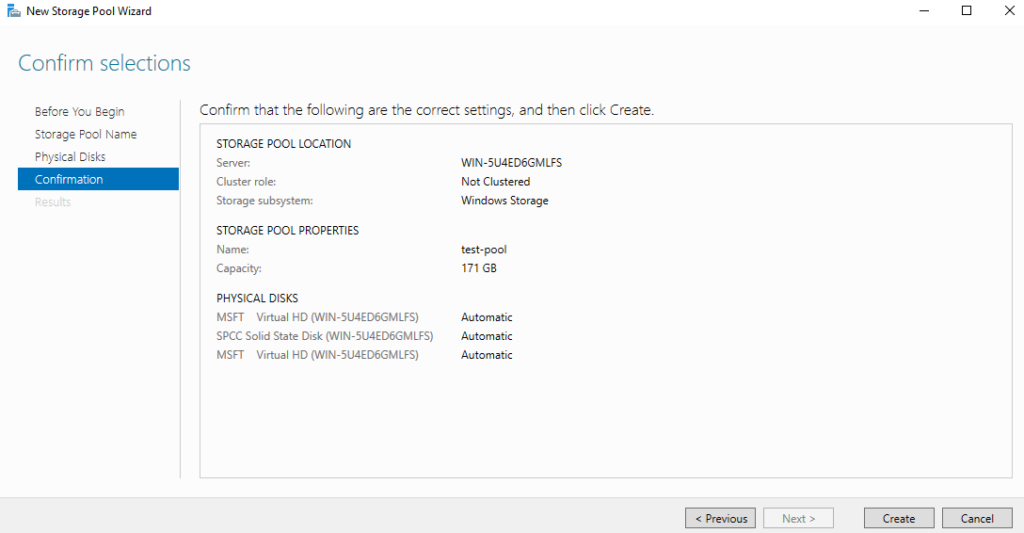
- In the End of process you will see “View results” window, click “Close”.
Due to the fact that AcloudA is not a standard HDD and does not have its own type, the system can not independently determine the type of drive, we will set it manually.
- Press the key combination “Win+R” for “Run” window and write the “powershell”, then click “OK”.
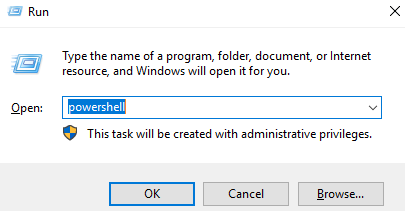
- In the window you should type:
Get-StoragePool test-pool | Get-PhysicalDisk | FT TriendlyName, Size, MediaType (where test-pool is the mane of pool with Aclouda)

- Then you should correct the drive type for Aclouda to HDD using next command:
Get-StoragePool test-pool | Get-PhysicalDisk | ? MediaType -eq “UnSpecified” |
Set-PhysicalDisk -MediaType HDD
- After that you have to check the correction you made:
Get-StoragePool test-pool | Get-PhysicalDisk | FT TriendlyName, Size, MediaType

After that you may close PowerShell window.
- Choose “Tasks”in “Virtual Disks” panel and click “Virtual Disk”.
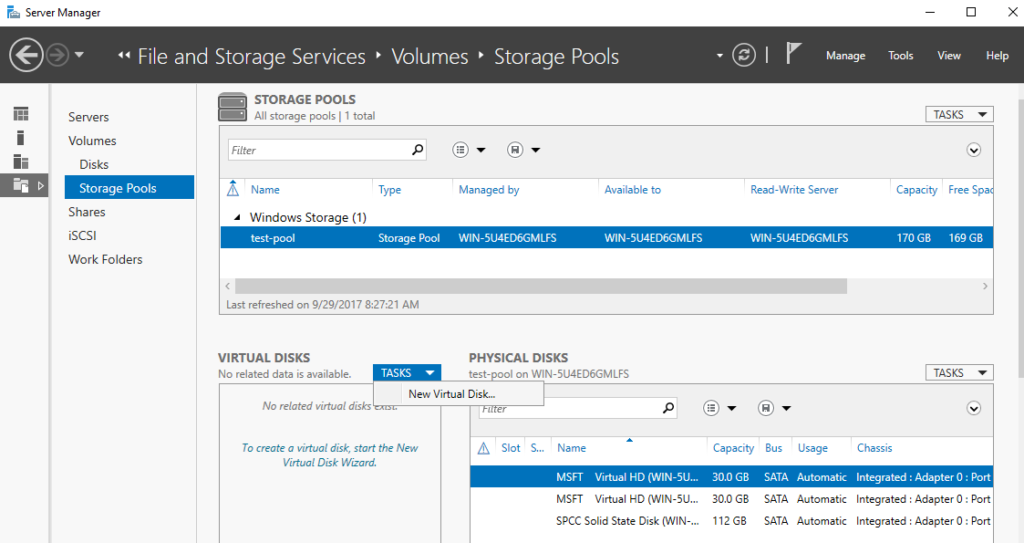
- In the window “Select the storage pool” choose storage pool you need and click “OK”.
- In the window “Before you begin” click “Next”.
- In the window “Virtual Disk Name” you must choose “Create storage tiers”, and enter the name of virtual disk, also you may add a description, then click “Next”.
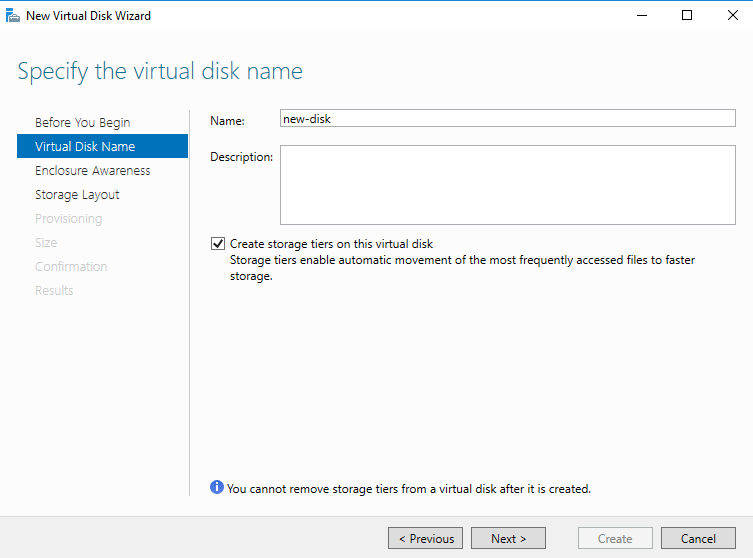
- In the window “Enclosure Awareness” just click “Next”.
- In the window “Storage Layout” choose Simple and click “Next”.
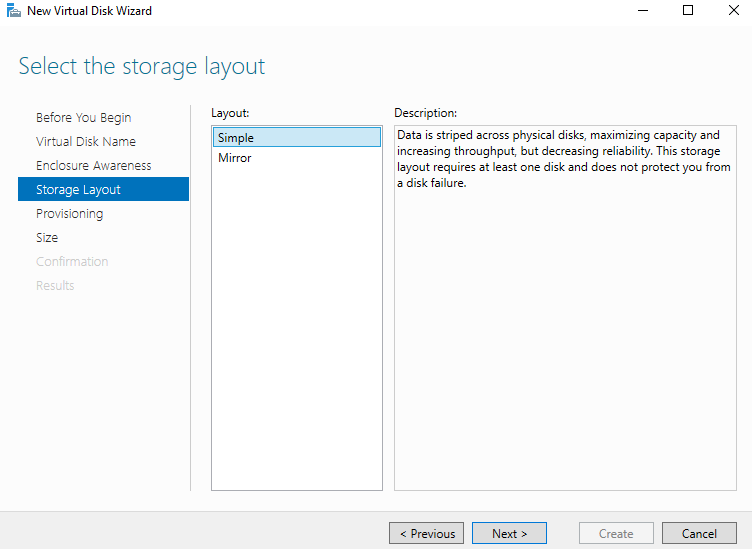
- In the window “Size” you must set size for your hot and cold data.
(we set it 20/50 Gb)
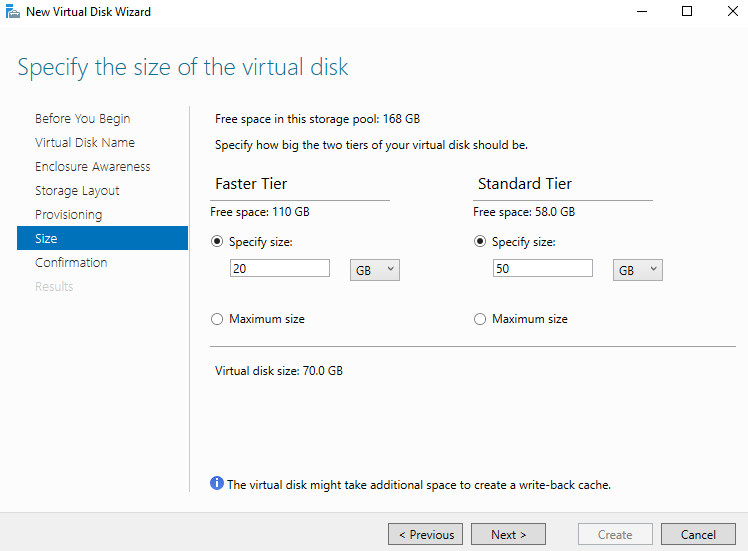
- In the window “Confirmation” you have to check all your changes and, if it’s right, click “Create”.
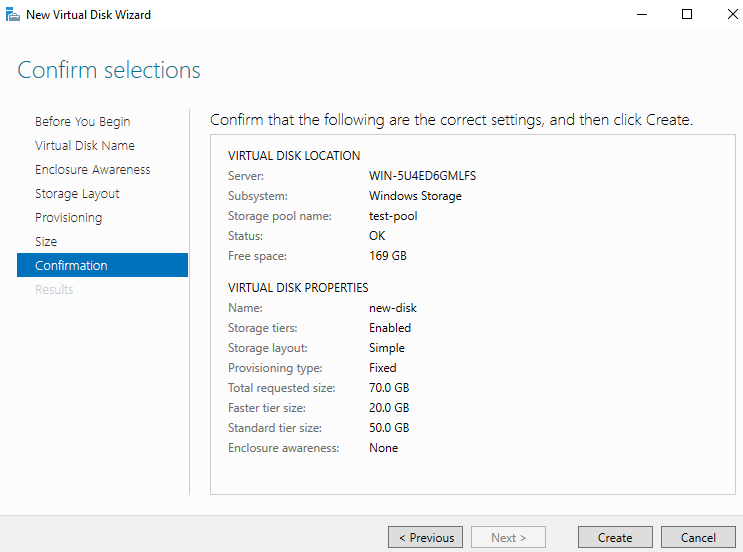
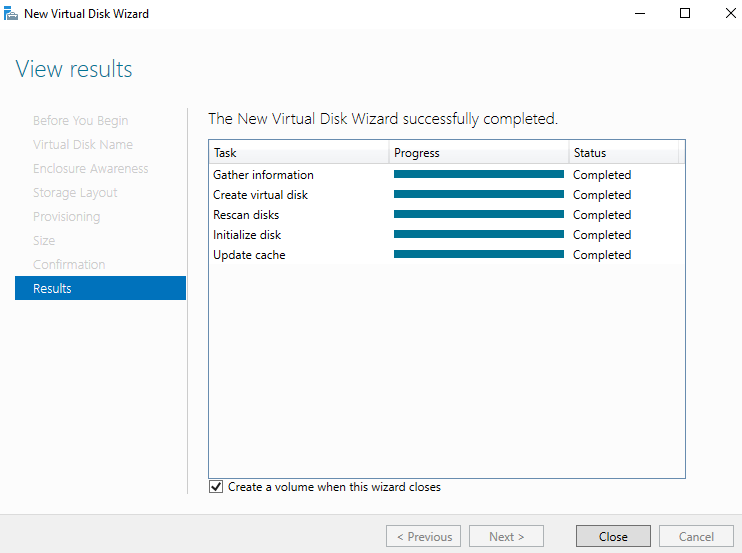
- Choosing “Create a volume when this wizard closes” and click “Close”.
- Click “Next” in the window “Before you begin”.
- Then choosing created Disk and click “Next”.
- The system tells us “The volume will be the same size as the virtual disks uses storage tiers”, just click “Next”
- Appoint any letter from available.
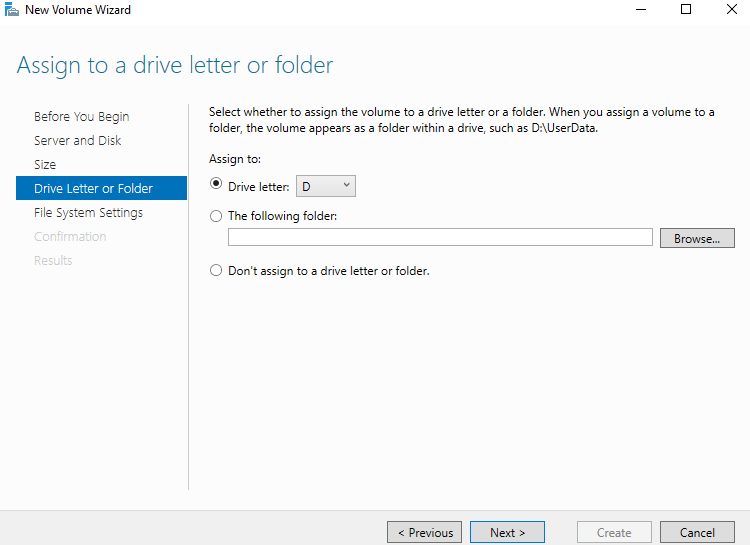
- Choosing the file system
(we left it by Default).
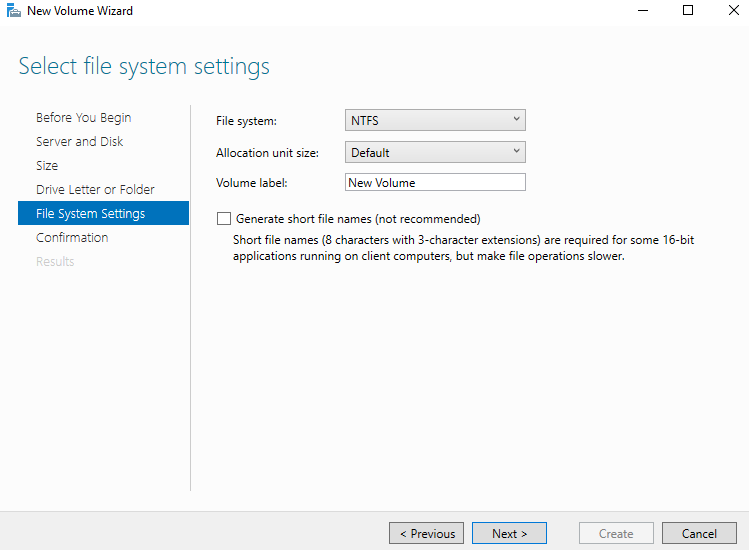
- Then you have to check all your information and click “Create”.
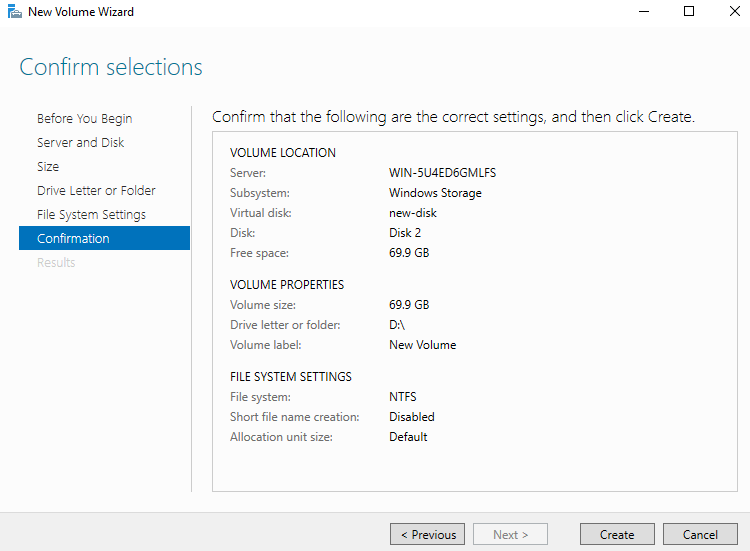
- Click “Close”.
Conclusions
In that way, we set up a storage with a total capacity of 70GB, which consists of 20Gb of fast (hot) storage and 50Gb of slow (cold) using AcloudA and Cloud storage. Until we fill the fast tiers the slow will not be used.
Fill the form below to get Extended version of this Guide